Configure VLAN
1. Topology Overview 🗺️
Imagine you’re the network administrator of a mid-sized company.
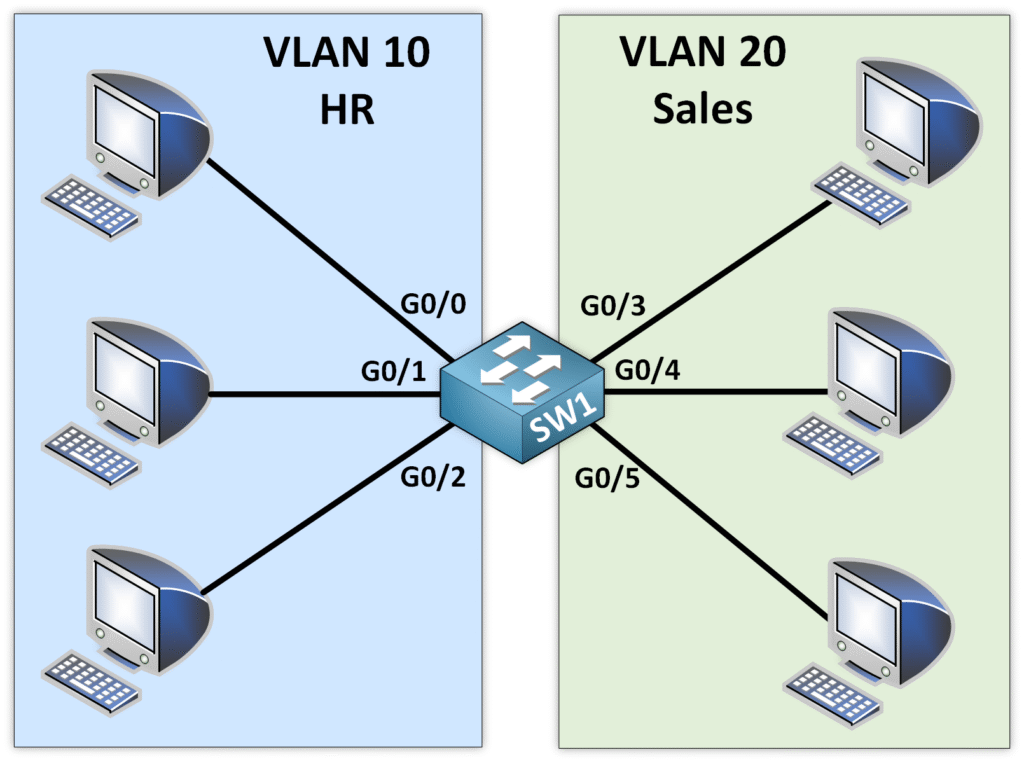
You’ve just received a task: separate the HR and Sales teams logically, even though their devices are connected to the same physical switch.
That’s where VLANs come in.
We’ll use this simple setup:
| VLAN | Department | Ports Assigned |
|---|---|---|
| 10 | HR | G0/0, G0/1, G0/2 |
| 20 | Sales | G0/3, G0/4, G0/5 |

Our mission:
- ✅ Create VLAN 10 and VLAN 20
- ✅ Assign the correct ports
- ✅ Verify everything step by step
🛠️ Step-by-Step: Creating VLANs
Let’s connect to the switch and begin:
- Enter Global Configuration Mode:
SW1# configure terminal
2. Create VLAN 10 for HR:
SW1(config)# vlan 10
SW1(config-vlan)# name HR
SW1(config-vlan)# exit
3. Create VLAN 20 for Sales:
SW1(config)# vlan 20
SW1(config-vlan)# name Sales
SW1(config-vlan)# exit
At this point, the VLANs exist in the switch’s database, but no interfaces are assigned yet.
🔎 Verify VLAN Creation
Run this command :
SW1# show vlan brief
VLAN Name                             Status    Ports
---- -------------------------------- --------- -------------------------------
1    default                          active    G0/0, G0/1, G0/2, G0/3, G0/4, G0/5
10   HR                               active
20   Sales                            active
1002 fddi-default                     act/unsup
1003 token-ring-default               act/unsup
Ports are still in VLAN 1 (Default VLAN). Next, we assign them correctly.
2. Assigning Ports to VLANs
Now we’ll tell the switch:
“Hey, these ports belong to HR. These others are for Sales.”
🔌 Step-by-Step: Assigning Access Ports
1. Assign ports G0/0 to G0/2 to VLAN 10 (HR)
SW1(config)# interface range G0/0 - G0/2
SW1(config-if-range)# switchport mode access
SW1(config-if-range)# switchport access vlan 10
SW1(config-if-range)# exit
2. Assign ports G0/3 to G0/5 to VLAN 20 (Sales)
SW1(config)# interface range G0/3 - G0/5
SW1(config-if-range)# switchport mode access
SW1(config-if-range)# switchport access vlan 20
SW1(config-if-range)# exit
🧠 What’s Happening Here?
switchport mode access: forces the port to operate in access mode (one VLAN only)switchport access vlan X: assigns the specified VLAN ID to the port
🔍 Verify Port Assignments
Check again with:
SW1# show vlan brief
VLAN Name                             Status    Ports
---- -------------------------------- --------- -------------------------------
1    default                          active    none
10   HR                               active    G0/0, G0/1, G0/2
20   Sales                            active    G0/3, G0/4, G0/5
1002 fddi-default                     act/unsup
1003 token-ring-default               act/unsup
✅ VLANs and ports are correctly configured
🎯 Each department has its own isolated environment
3. VLAN Configuration Management
Let’s now dive into how VLANs are stored, modified, and reset on a switch.
📁 What is vlan.dat?
When you create a VLAN, the configuration isn’t saved in the running-config.
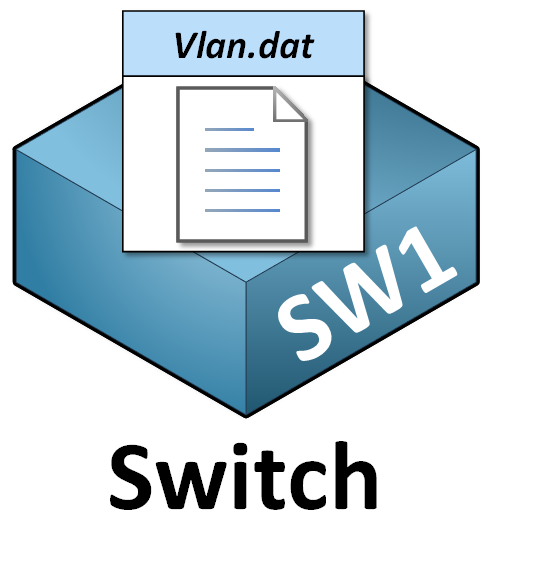
Instead, it’s stored in a separate file: vlan.dat, located in flash memory.
Why is this important?
- The VLAN database survives reboots
- If you delete
vlan.dat, you delete all custom VLANs - Even if you
erase startup-config, the VLANs will stay unlessvlan.datis manually removed

✏️ Modify a VLAN (example Rename)
Need to rename an existing VLAN?
No need to delete and recreate it—you can simply edit it.
Here’s how:
1. Enter VLAN configuration mode:
SW1# configure terminal
SW1(config)# vlan 10
SW1(config-vlan)# name HR_Department
SW1(config-vlan)# exit
2. Rename the VLAN (from “HR” to “HR_Department”):
SW1(config-vlan)# name HR_Department
You can now verify the change with:
SW1# show vlan brief
VLAN Name                             Status    Ports
---- -------------------------------- --------- -------------------------------
1    default                          active    none
10   HR_Department                    active    G0/0, G0/1, G0/2
20   Sales                            active    G0/3, G0/4, G0/5
1002 fddi-default                     act/unsup
1003 token-ring-default               act/unsup
🧹 Removing VLAN Configurations
Here’s a key thing to know:
VLANs are not saved in the running-config or startup-config—they’re stored in a separate file called vlan.dat.
This file is located in the switch’s flash memory, and it keeps all your VLANs persistent across reboots.
🧠 If you want to completely wipe VLAN configurations, you need to delete
vlan.datmanually.
Removing VLAN Configurations
- Delete the VLAN database:
SW1# delete flash:vlan.dat
Delete filename [vlan.dat]? [confirm]
2. Erase the startup configuration:
SW1# erase startup-config
3. Reload the switch:
SW1# reload
⚠️ The switch will reboot and come back with only the default VLAN (VLAN 1).
✅ Verifying the Reset
Once the switch is back online, run:
SW1# show vlan brief

VLAN Name                             Status    Ports
---- -------------------------------- --------- -------------------------------
1    default                          active    G0/0, G0/1, G0/2, G0/3, G0/4, G0/5
1002 fddi-default                     act/unsup
1003 token-ring-default               act/unsup
✅ Only VLAN 1 remains
❌ VLAN 10, VLAN 20, and any others are gone
👉 Your switch is now clean and ready for a new configuration.
Ready to go further?
➡️ In the next lesson, we’ll configure trunk ports, which allow VLANs to travel between switches—a key concept for scaling your network.
Let’s keep going! 🚀
